How to connect Radoop to an HDInsight cluster

The easiest way to try Radoop is to spin up an Azure HDInsight cluster and connect to it. In a few minutes, you can have a working Hadoop environment and your local RapidMiner Studio connected to it. Here’s how:
Start by spinning up a Hadoop cluster in Azure
You’ll need a Microsoft account set up for this. You have to go to the portal and create a new resource. Just type “HDInsight” in the Marketplace and select it.

The cluster type should be Hadoop and version 3.5. Make sure you select “Custom” instead of “Quick create”. You should see all these 6 steps:

This is important because we’ll need to spin up a RapidMiner Server acting as a Radoop Proxy and we need to be able to specify the same network as in the HDInsinght cluster. Fill in all the needed fields and take note of the Virtual network you select on step 5.
In the “Summary” tab, click on create and you’ll need to wait for a few minutes until the deployment is ready.
In the meantime, you can start with the deployment of RapidMiner Server, which will act as our Radoop Proxy forwarding the jobs from your Studio while keeping a secure single point of entry for your Hadoop cluster.
Spin up a RapidMiner Server in Azure
Go back to your Azure dashboard and add a second resource. This time search for “RapidMiner” and select “RapidMiner Server 8.1”, or the latest available version.

Again, fill in the details and be especially careful to use the same Resource Group and the same virtual network as with HDInsight. That way, the communication between the Radoop Proxy and the cluster will be possible. Once ready, click on “create”.
当部署完成后你可以登录-
http://[RapidMinerServer ip]:8080
The user isadminand the password is the name of the VM. Once logged in, you’ll need to paste you RapidMiner Server license, be it paid or free, which you can copy from
https://my.www.turtlecreekpls.com/nexus/account/index.html#licenses/rapidminer-server
(where you can log in with your RapidMiner credentials).
Configure the Radoop Proxy in your RapidMiner Studio
现在环境已经准备好了,我们需要让Studio know where the Proxy is. In RapidMiner Studio, go to “Connections->Manage connections” and click on “Add connection”. Fill in the IP of the RapidMiner Server VM you spun up in Azure and click on test to make sure it’s working and save all changes.

Configure the name server
Studio will need to access some of the nodes in the HDInsight cluster, so their names have to be visible from the local machine where you are running Studio.
You can find the names and IPs in your Ambari Manager (hosts tab).

Only the ones starting withhn0andhn1are needed. The easiest way to make your local machine aware of those names is to edit the local hosts file (/etc/hostsin Linux orC:\Windows\System32\drivers\etc\hostsin Windows). You’ll need add three lines, for example:
#hdinsight
10.0.3.27 hn0-test.fx.internal.cloudapp.net
10.0.3.27 headnodehost
10.0.3.26 hn1-test.fx.internal.cloudapp.net
Where you have to replace the IPs and names with those that you can found in your Ambari Manager page. You’ll need administrative rights to do it.
Import the configuration from HDInsight
Now you need to import the cluster configuration to create the Radoop connection. Again, in Studio, go to “Connections-> Manage Radoop Connections”. Click on “New Connection” and select “Import from Manager”.

You end up with a pre-filled connection. There are a few details you’ll need to fill in, however:
- In the “Proxy Location”, select “Local” and in “Radoop Proxy Connection”, select the one you created in the third step of this guide.
- In Spark version, select 1.6.
- You’ll see a long list of pre-filled “Advanced Hadoop Parameters”. You only need to change one: “fs.azure.account.key.[your Azure storage account] .blob.core.windows.net”. The parameter is already defined, you just need to write the value. You can find it in your HDInsight portal: All Resources-> Your storage account->Access keys.
Final step: test and run your processes!
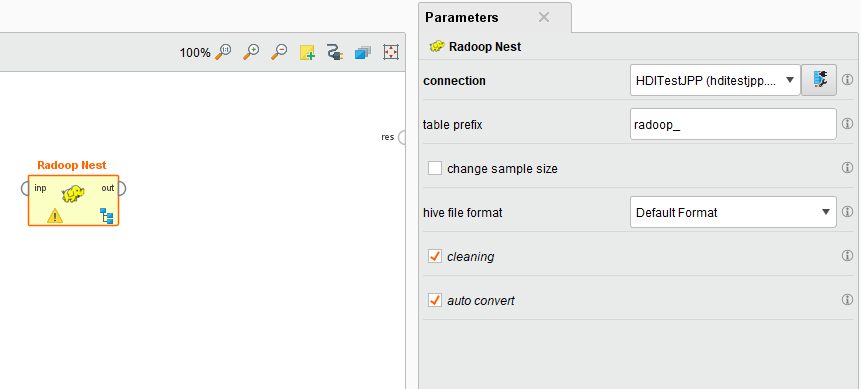
Once the connection is ready, you can save it and run a full test. Everything should work. Now you can create your first process. Drag and drop the “Nest” operator and select your connection.

Any operator inside the Nest will run on your HDInsight cluster.


