You are viewing the RapidMiner Studio documentation for version 9.0 -Check here for latest version
Using the Zapier Connector
The Zapier connector allows you to connect to over 300 popular Cloud data services.Zapieritself works by defining triggers and actions and combining them into so-calledZaps. TheTrigger Zapieroperator can be used to trigger yourZaps.
Follow these steps to configure the Zapier connector:
打开一个不w process
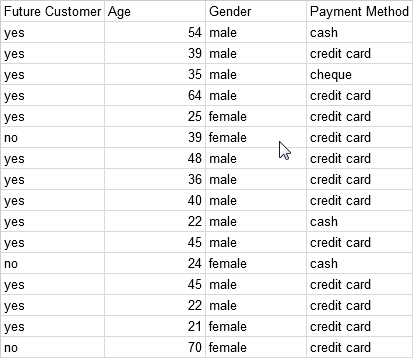
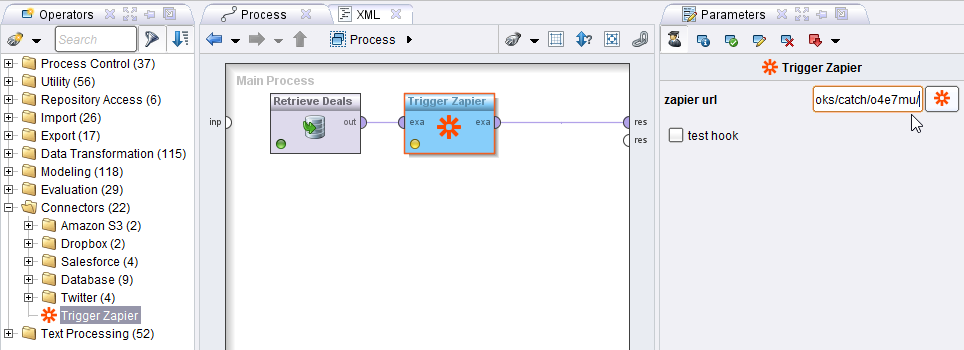
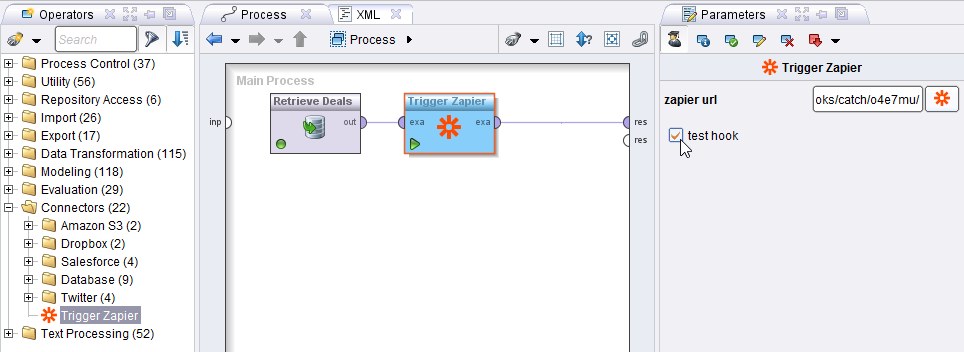
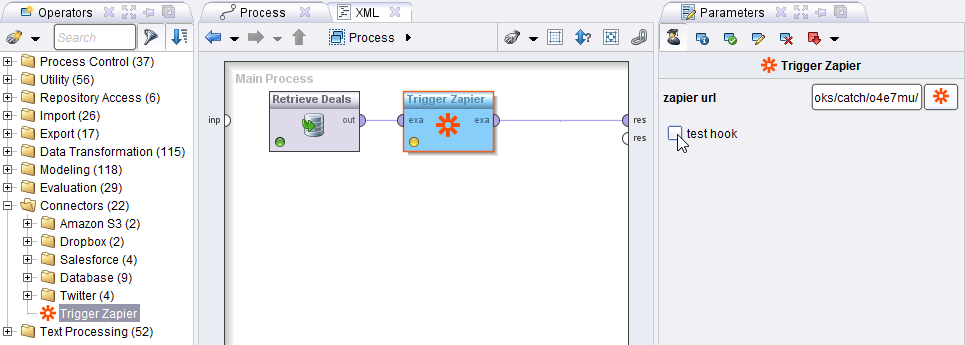
 in RapidMiner Studio and drag an example set (e.g.,Dealsdata) into theProcessview. Note that theTrigger Zapieroperator always needs an operator that provides a data set. YourZapwill be triggered once for each example in this set.
Drag theTrigger Zapieroperator into theProcessview and click on the operator.
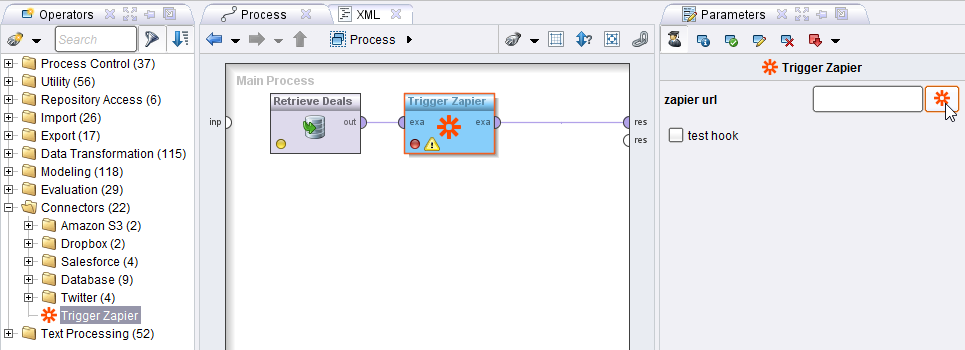
In theParametersview, click on the Zapier icon
 to go to the Zapier website. Accept the invite to use the RapidMiner App on Zapier. If you are not already logged into your Zapier account, do so and accept the invite again.
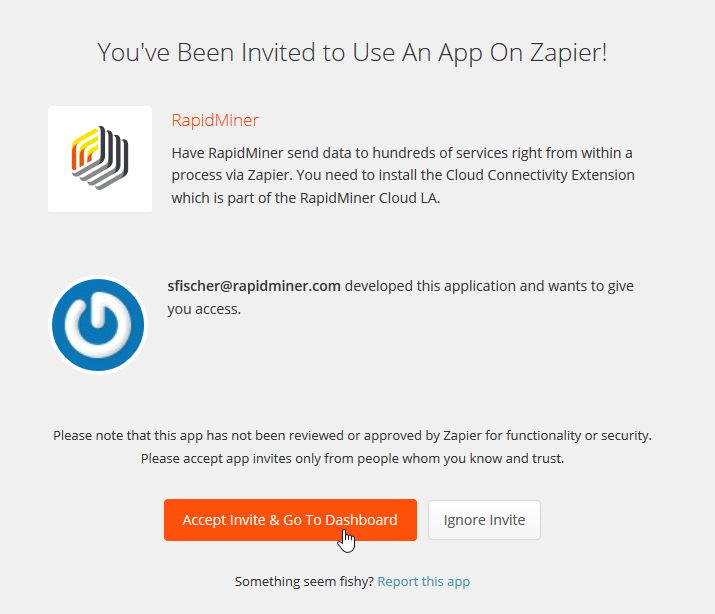
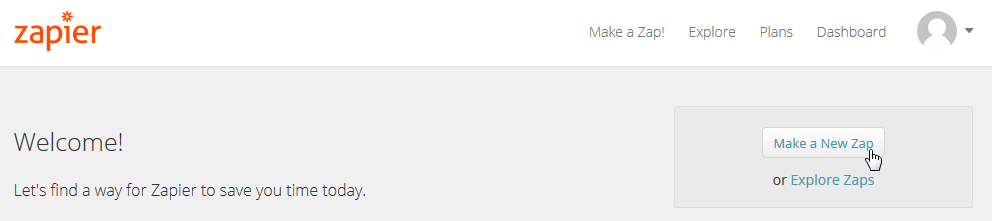
In your dashboard click onMake a New Zap:
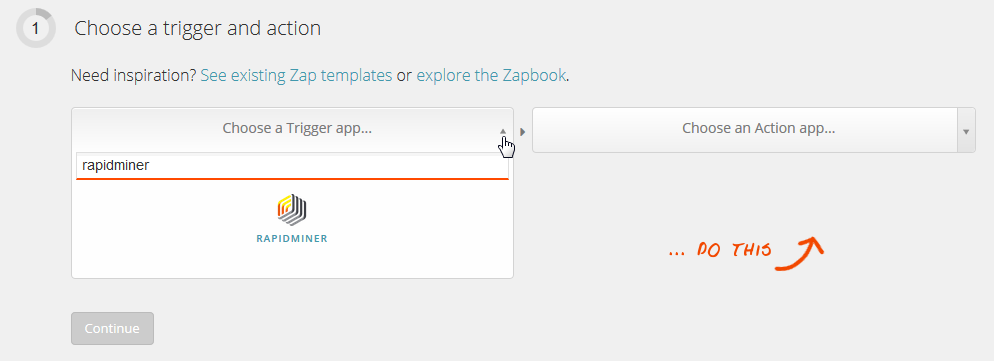
SelectRapidMinerasTrigger app:
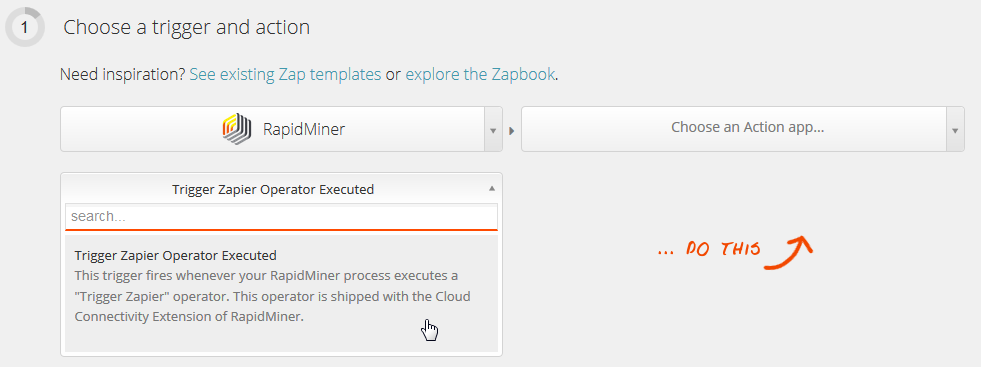
andTrigger Zapier Operator Executedas Trigger:
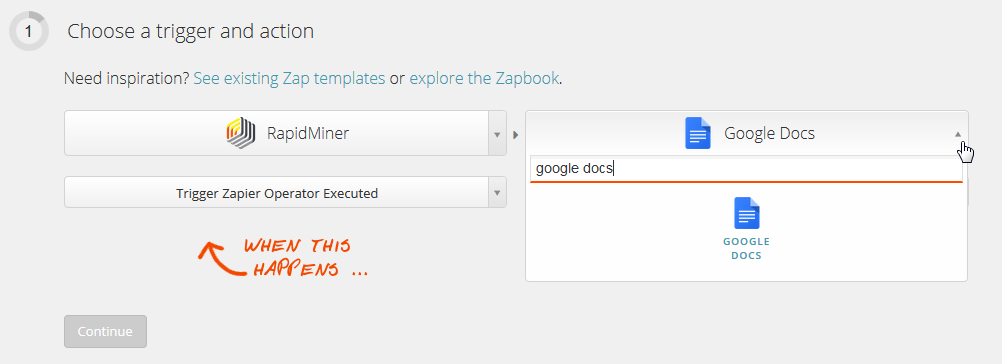
Choose anAction appfrom the list (e.g., "Google Docs"):
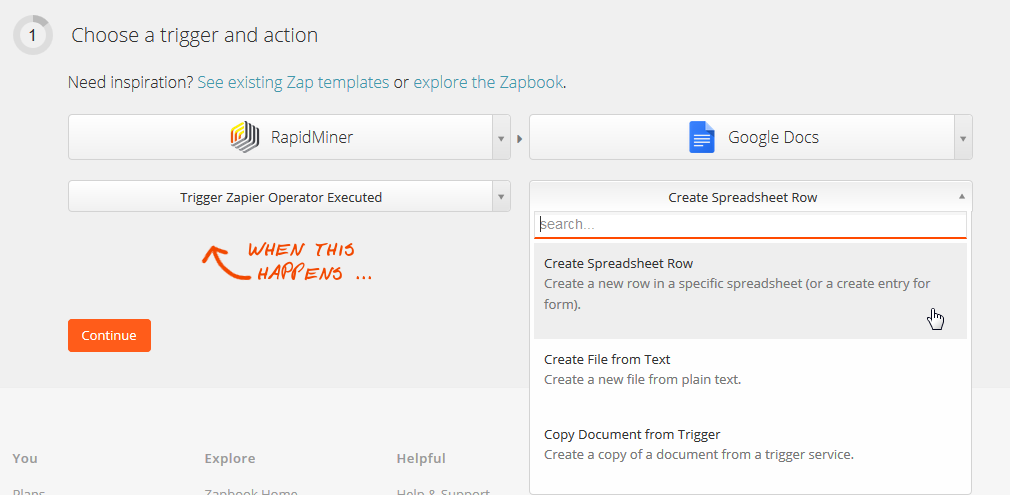
and select an action:
Copy the URL generated:
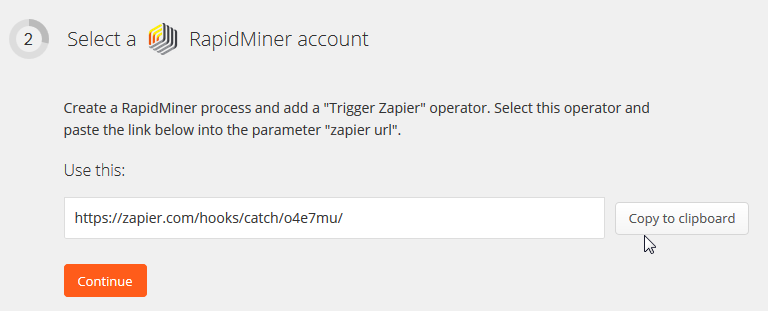
and paste it into the parameterzapier urlof theTrigger Zapieroperator:
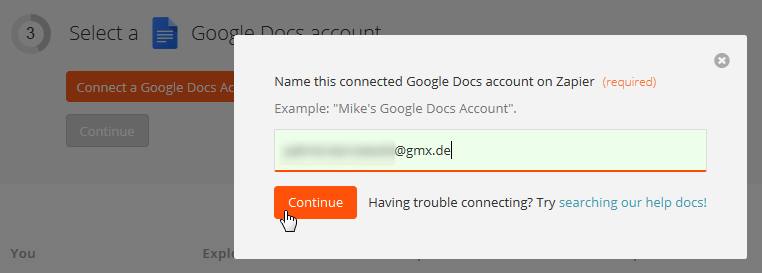
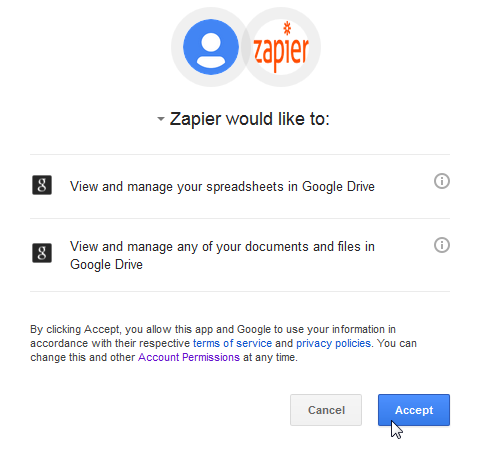
Zapier will request you provide a user account for the Action App you selected.
Switch back to RapidMiner Studio, selecttest hook, and run the process.
This lets Zapier know which attributes to expect. The following steps will show you how to configure and filter the generated attributes in Zapier. In this test mode only test messages will be sent to Zapier and will not trigger yourZap.
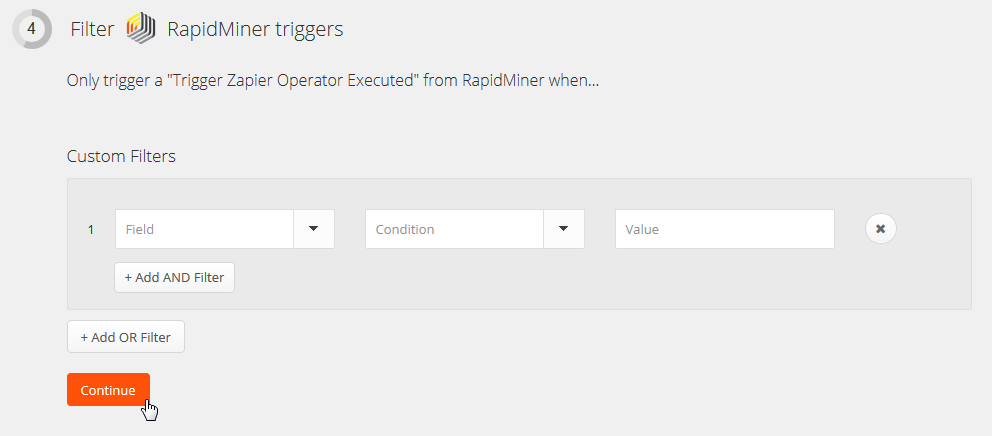
You can add filters such that yourZapwill only be triggered under certain conditions.
If the attributes of your example set are not shown in the drop down menus you might have to refresh the website.
Match up theTrigger Zapieroperator with your action:
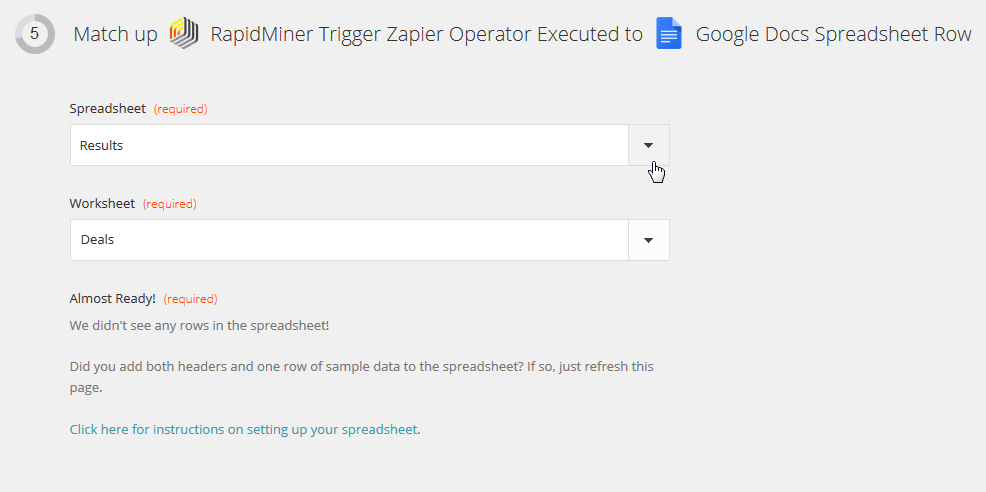
Follow Zapier's instructions — note that they may differ depending on your Action App. ForGoogle Docs - Create Spreadsheet Rowyou need to add headers and a row of samples to your spreadsheet:
Click onInsert fieldsto map your data set attributes to your spreadsheet headers:
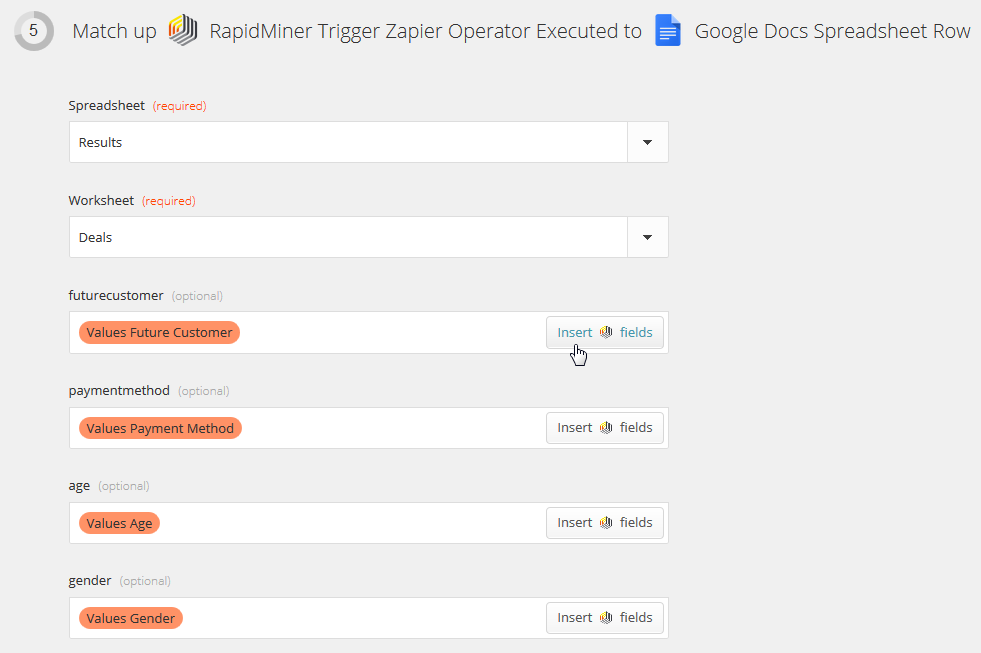
If the attributes of your example set are not shown in the drop down menus you might have to refresh the website.
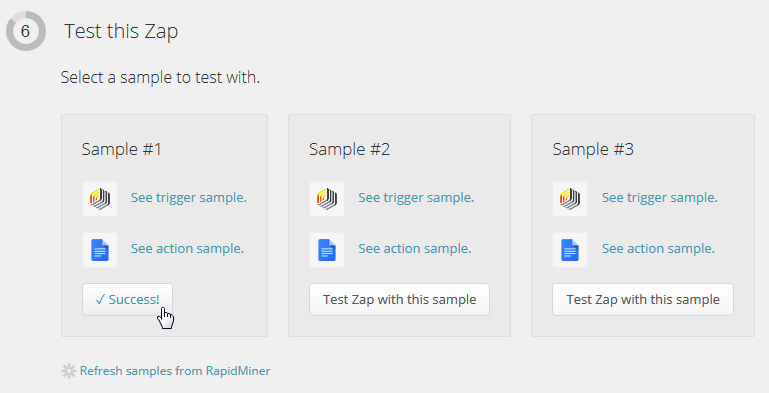
Test your configuration:
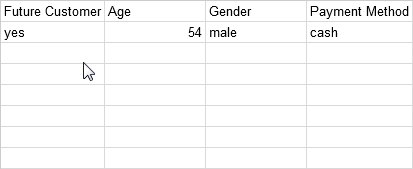
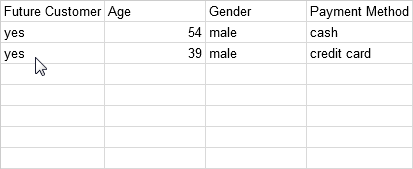
For ourGoogle Docs - Create Spreadsheet Rowexample, you can see that a new row is added for each test.
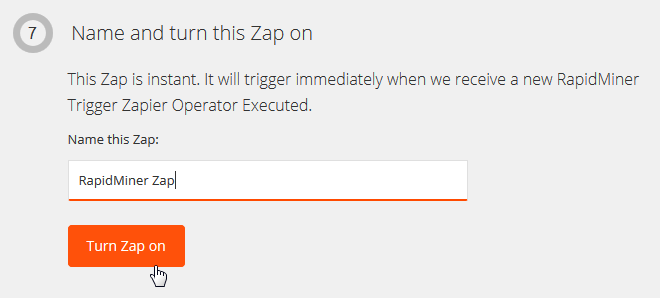
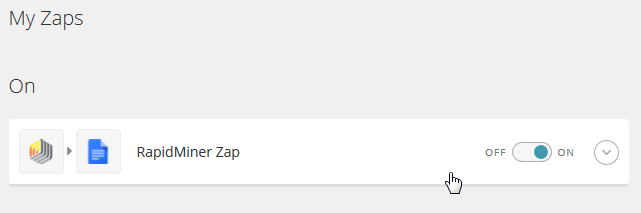
你的名字Zapand turn it on:
You can see the status of yourZapin the dashboard:
Now you can use theTrigger Zapieroperator in your process! Remember to deselect thetest hookbefore running it:
Running our sample process withGoogle Docs - Create Spreadsheet Rowproduces the following spreadsheet: