You are viewing the RapidMiner Server documentation for version 9.7 -Check here for latest version
Installing and Starting RapidMiner Server
See thedeployment documentationto learn how to install RapidMiner Server using Docker images.
The recommended method is to use Docker. The documentation below is provided in case you prefer a non-Docker solution.
The following sections describe all the steps required to get RapidMiner Server andJob Agents我nstalled and running using theFull Server Package.If you are familiar with these procedures, you can use theQuick Start一个s a reference for the installation process instead of these more detailed instructions.
You may want to verify that your system meets thesystem requirementsbefore beginning the installation.
The following sections describe all the necessary steps for getting RapidMiner Server fully operational:
- Prepare for the installation
- Create a database server, if necessary
- Download RapidMiner Server
- Install and configure
- Start the server and complete web-based configuration
- Connect to RapidMiner Studio
Prerequisites
The following are required to successfully install RapidMiner Server:
| Prerequisite | Comment |
|---|---|
| Java 8 (either JDK or JRE) | If it is not already present,我nstall Java 8.The installer displays an error message if it finds Java 7 (or a version earlier than 7), but does not block the installation. However, RapidMiner Server requires Java 8 and will otherwise return an error at start up. |
| A RapidMiner Server database | The RapidMiner Server database (schema) stores configuration files, cron job details, user report requests, and other RapidMiner support data. You can use an existing database server or create a new one; it can reside locally or on a remote host. Refer tothese instructionsfor an example of creating a database schema for use by the RapidMiner service, using one of the many supported database platforms. |
| A RapidMiner Server database user with credentials | During installation you will need to supply database access credentials for a user with read, write, and create and delete tables permissions. You can refer tothis exampleof setting permissions using PostgreSQL. |
| RapidMiner Studio | You need a fully functioning RapidMiner Studio client to use RapidMiner Server for any meaningful operations. |
Once the prerequisites are met, you canbegin the installation.
Installation instructions
Use the following steps to 1) download 2) configure, and 3) install RapidMiner Server. Once the installation process is complete, if youselected to do so,设置保存到配置文件中。You can later modify the file (for example, change hostname or ports) and easily install the RapidMiner Server service on a different machine. (See the section onheadless installationfor more information on this option.)
Downloading RapidMiner Server
Follow these steps to download the full RapidMiner Server package:
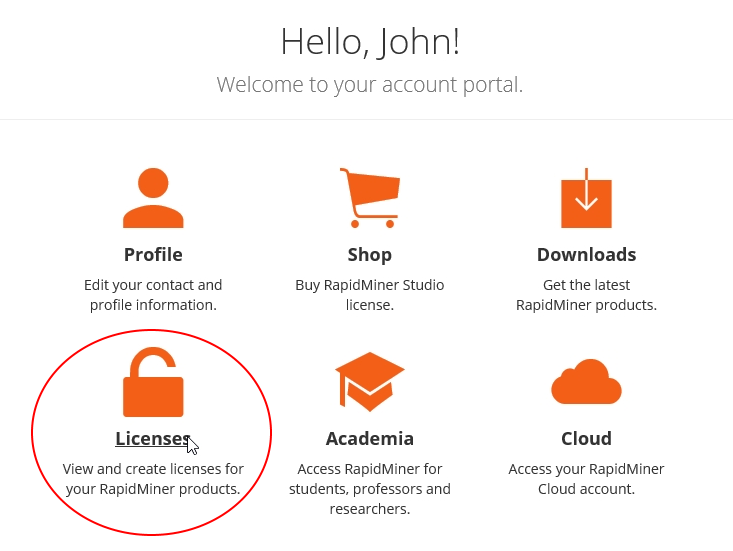
Log into yourRapidMiner account一个nd click theDownloads我con or tab:
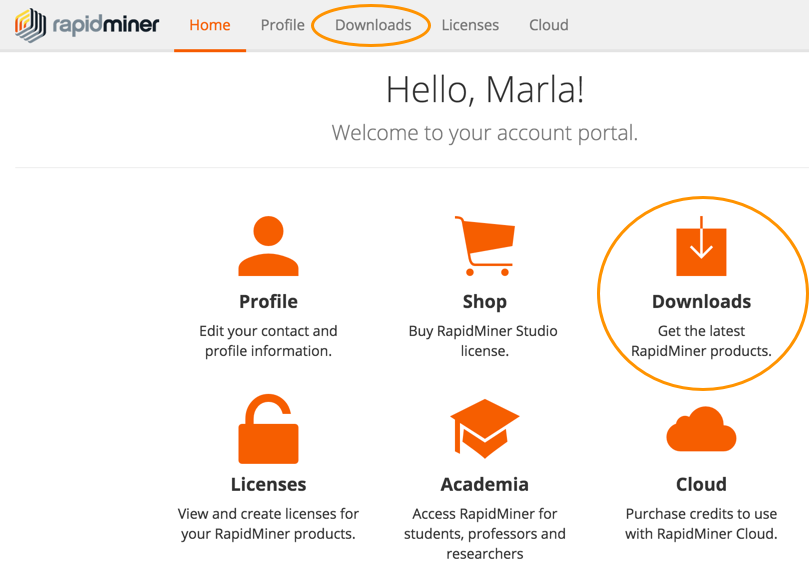
From theDownloadspage, select the appropriate type of installation for your environment.
Unlike RapidMiner Studio, you do not need to pick an operating system platform for the Server edition. ClickDownload一个nd accept the EULA to download the zip filerapidminer-server-installer-x.x.x.zip, which contains the RapidMiner Server package.
Extract the contents of the download file to an installation directory.

Installing RapidMiner Server
The following steps describeServer我nstallation. The installation script requires Java 8; if it is not available (not on the path or JAVA_HOME is not set), the installer will not run correctly. If it does not run, check your Java installation.
Note for Windows Users: It is helpful to run the installation asAdmin.This allows the installer to register the service. Additionally, a standard user is not allowed to write to all folders on the system (for example,C:\Program Files). If you do not want to register RapidMiner Server as a service and plan to install to a folder you have write access to, admin privileges are not required.
Change to the
bindirectory (within the installation directory) to locate the start script (or batch file) for the installation.- For Windows, use the filerapidminer-server-installer.bat
- For Linux, Unix, or Mac OS, use the filerapidminer-server-installer
AsAdmin, run the appropriate installer script. TheRapidMiner Server Installerwindow opens. This is not the RapidMiner service; it is a tool to help you preconfigure the service.
In theRapidMiner Server Installerwindow, read theBefore You Starttext and click
 Nextwhen you are ready.
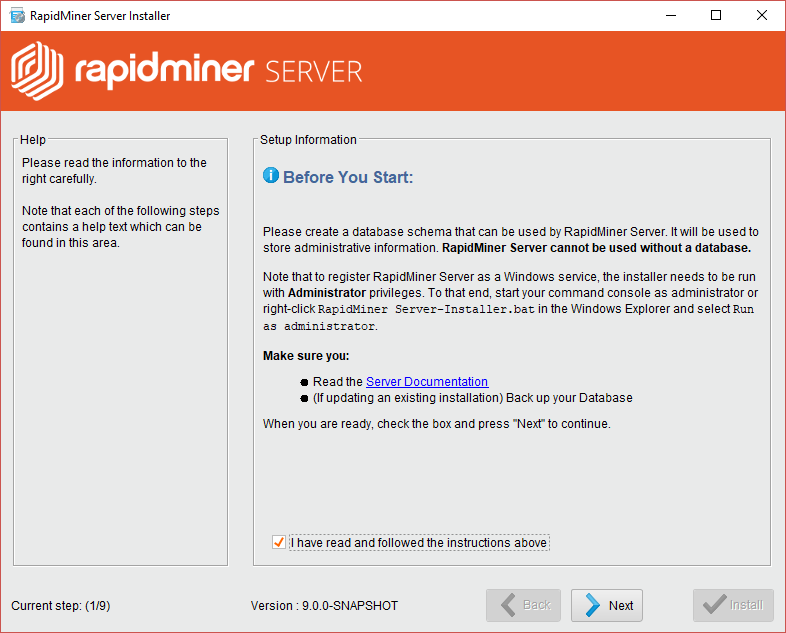
In the next window, select the mode
Fresh installation of RapidMiner Server.You can install either locally or you can create a configuration file used for aheadless installation.If you select a headless installation, browse to a file location for storing the resulting XML file. ClickNext.Scroll to the bottom of the EULA screen, check the box to accept, and click
Next.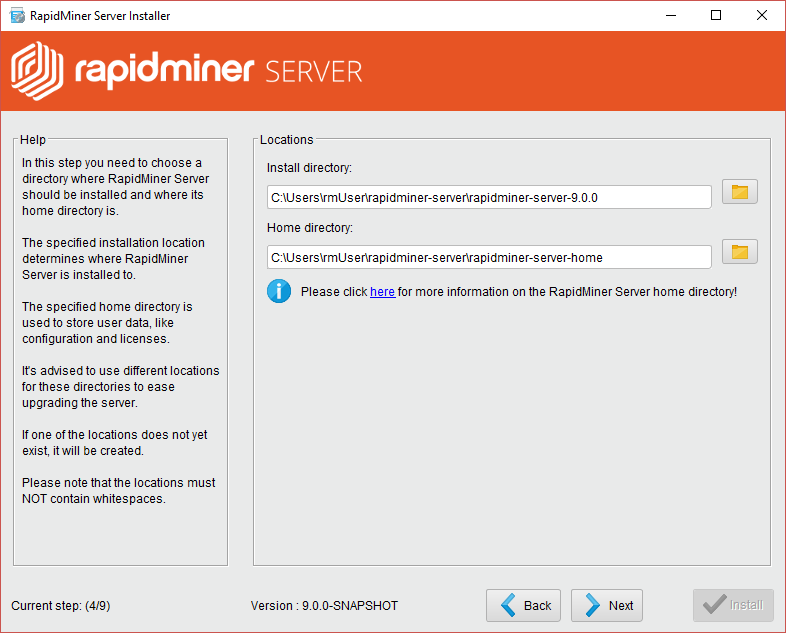
Enter or browse to the location where RapidMiner Server should be installed. Please ensure that the folder path does not contain
+or%characters and the file system supports UTF-8.Enter or browse to the location where theRapidMiner Server home directoryshould be located. The home directory is a central place for stored repository content, extensions, logs and configuration files. Please ensure that the folder path does not contain
+or%characters and the file system supports UTF-8. ClickNext.The RapidMiner Server InstallerLicensewindow opens.From your account portalLicensespage, copy the license key to your clipboard. (See this一个dditional information我f you need help copying your key.)
Paste the key into theLicensewindow. The license registration information updates based on the details of the entered license. Click
Next.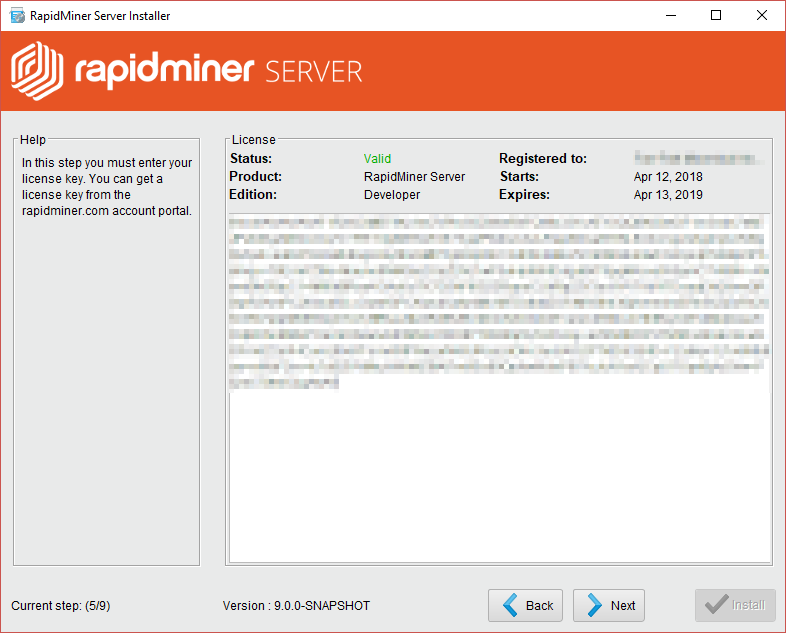


To copy the license key to your clipboard:
- Log in to your account portal and go to theLicenses page.
When the page opens, make sure theServertab is selected. Your license information, including license type and expiration, displays:
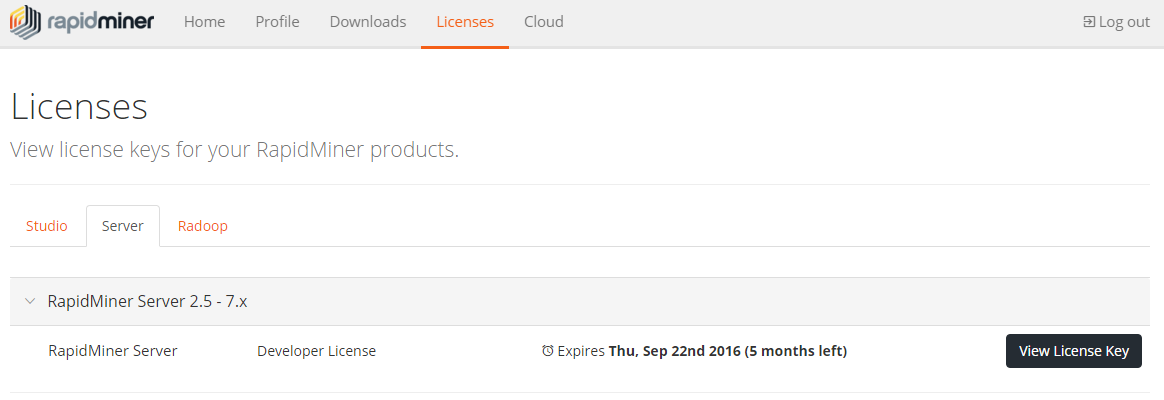
- ClickView License Keynext to the appropriate license to display the key.
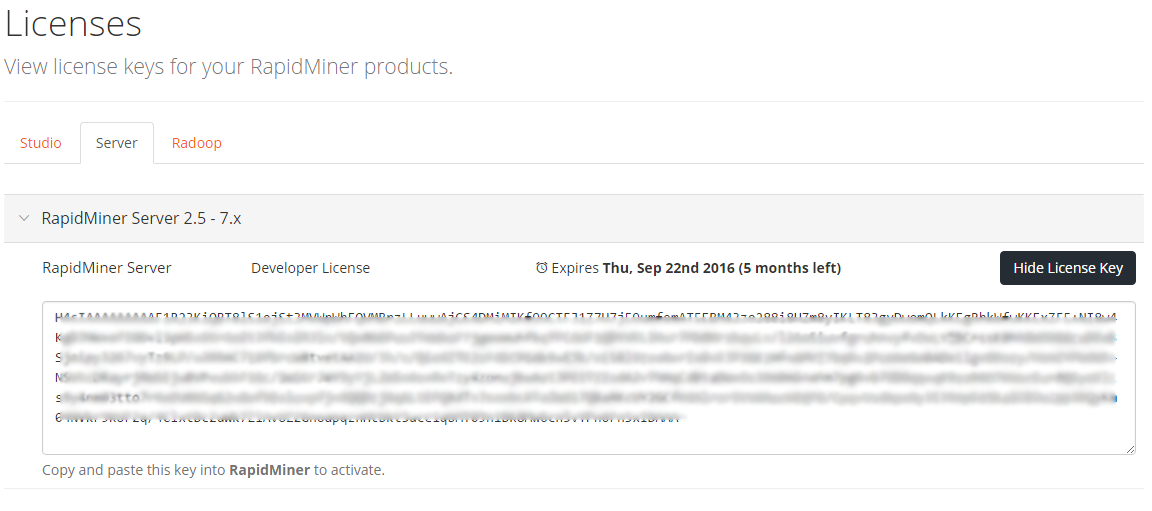
- Click in the box containing the key to select it, then copy it to your clipboard.


The服务器设置window opens.
Configuring RapidMiner Server settings
On this screen, you set the connection settings for RapidMiner Server.
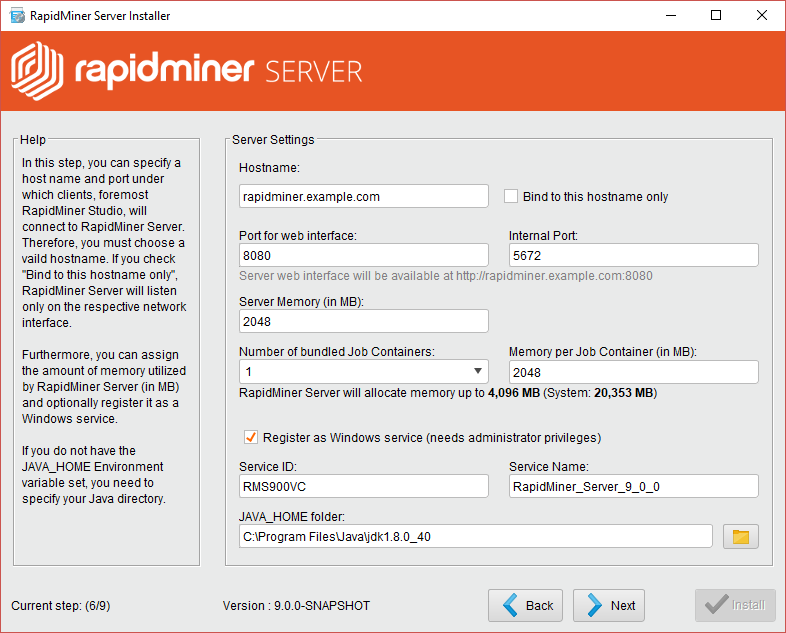
In theRapidMiner Server Settingswindow, enter the server settings:
| Field | Value |
|---|---|
| Hostname | Enter the hostname or IP address for the local machine hosting the RapidMiner Server service. |
| Bind to this hostname only | Check this box to prevent the server from binding to all available local interfaces. You may want to check this, for example, if the server has more than one IP address and you want to limit the RapidMiner service to run on only one. Default: false |
| Port for Web Interface | Enter the port used over which clients, typically RapidMiner Studio, will connect. Default: 8080 |
| 内部端口 | Enter the port used for internal communication between RapidMiner Server components. Default: 5672 |
| Server Memory (in MB) | Enter the amount of memory you want allocated to RapidMiner Server, excluding the memory allocated to Job Containers. This amount may be limited based on yourlicense limits. |
| Number of bundled Job Containers | Job Containers are responsible for running your processes. If this number ishigher than 0then Server will start adefault Job Agentfor local process execution. Default: 1 |
| 每工作记忆容器(MB) | Enter the amount of memory you want allocated to each Job Container. This amount may be limited based on yourlicense limits. |
| Register as a service (Windows only) | Select this option to register RapidMiner Server to run as Windows service. You must haveAdminprivileges for this setting to take effect. (Under UNIX you can一个utostart RapidMiner Server, but the method is dependent on your UNIX distribution.) |
| Service ID | Enter an identifier for the version of RapidMiner Server; this is the ID by which Windows refers to the service. The default value is composed of the RapidMiner Server release and version number. |
| Service Name | Enter the name to display in the services list. |
| JAVA_HOME folder | Verify that the path to the Java directory, which was automatically completed based on the setting of JAVA_HOME, is correct. If it is not filled in or is not correct, browse to the directory containing your Java 7 or 8 installation. Be certain that if you have multiple Java versions, you select the folder that contains Java 7 or 8. |
Click![]() Nextto open theDatabase Configurationwindow.
Nextto open theDatabase Configurationwindow.
Configuring RapidMiner Server's database connection
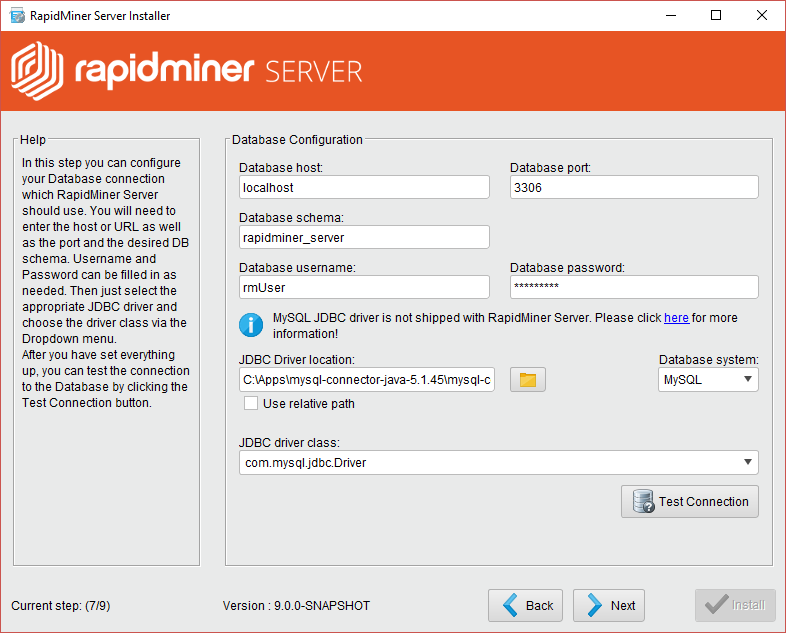
On this screen you configure and test RapidMiner Server's database connection.
Note:If your database system is not one of the available choices (MySQL, MSSQL, Oracle, PostgreSQL), see the RapidMiner Supportknowledgebase articlefor information on modifying your configuration file.
Enter your database settings:
| Field | Value |
|---|---|
| Database Host | Enter the hostname or IP address for the local machine hosting the RapidMiner Server installation. For the local machine, enterlocalhostor 127.0.0.1. |
| Database port | Enter the port number used to access the RapidMiner Server database. |
| Database schema | Enter the name of your existing database or the name of thedatabase you created. |
| Database username | Enter the name of the user with login privileges to the RapidMiner Server database. |
| Database password | Enter the password for the user with login privileges to the RapidMiner Server database. |
| Database System | From the drop-down list, select the database system to be used for the RapidMiner Server database. |
| JDBC Driver location | Specify the appropriate JDBC connector, a JAR file that contains the driver class information for the system to connect to a database from Java. If you want to use a driver different from those included, set the path for the new driver package file in this field. |
| JDBC Driver class | Select the corresponding driver class from the dropdown menu. |
Click![]() Test Connectionto verify connectivity. If you receive a message that your database connection was successful, click
Test Connectionto verify connectivity. If you receive a message that your database connection was successful, click![]() Next配置email settings. If you receive an error, double-check your username and password entries.
Next配置email settings. If you receive an error, double-check your username and password entries.
Configuring email settings
Optionally, you can complete the fields of theE-Mail Serverwindow to register an email account. RapidMiner Server uses this address to send email notifications based on triggers, process results, and password resets.
If you do not plan to use this functionality, leave the fields blank and click![]() Next.
Next.
Note:Be certain to either complete all fields or leave all fields blank; partial email configuration prevents RapidMiner Server from starting.
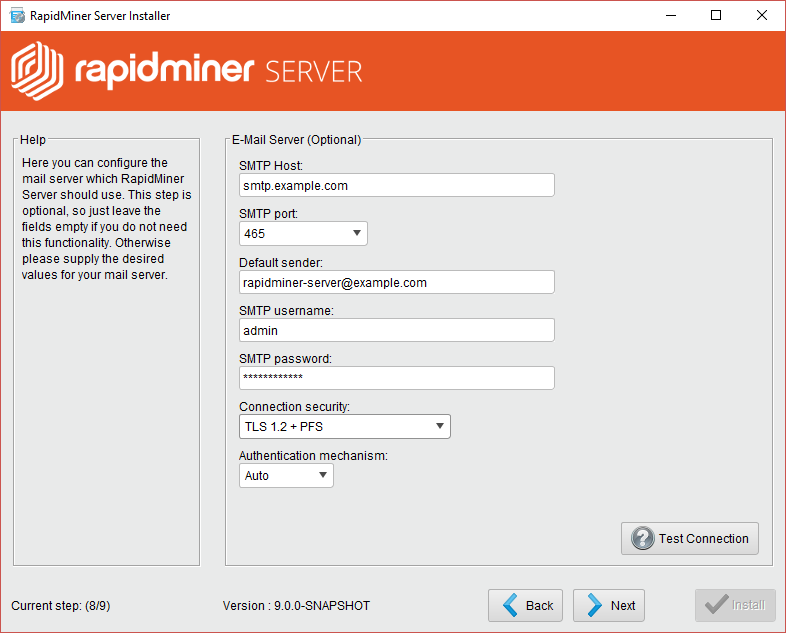
If you do plan to configure an email server, enter your email server settings:
| Field | Value |
|---|---|
| SMTP Host | Enter the name of the host server that sends email. The mail client connects to this server to send outgoing mail (for example,smtp.gmail.comorsmtp.mail.yahoo.com). |
| SMTP port | Enter the port used to connect to the SMTP host. The default SMTP is 25 for unencrypted mail; for encrypted transfer, the default ports are 465 (SSL/TLS) or 587 (StartTLS). |
| Default Sender | Enter an email address. This is the address that appears in the "From" field of the outgoing email. |
| SMTP username | Enter the username given access to the mail server (for example, admin). |
| SMTP password | Enter the password used to authenticate the named user. |
| Connection security | Enable TLS or StartTLS, optional restricted to TLS 1.2 with the following cipher suites: TLS_ECDHE_ECDSA_WITH_AES_128_CBC_SHA256 TLS_ECDHE_ECDSA_WITH_AES_128_GCM_SHA256 TLS_ECDHE_RSA_WITH_AES_128_CBC_SHA256 TLS_ECDHE_RSA_WITH_AES_128_GCM_SHA256 |
| Authentication mechanism | Choose how to authenticate to the SMTP server. |
Complete the fields, Test the connection and click![]() Next.
Next.
Installing Radoop Proxy
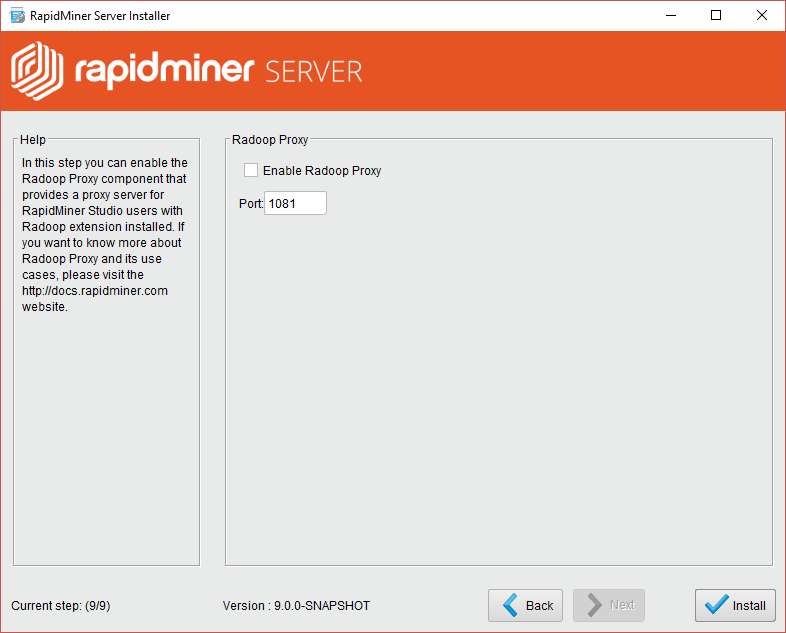
This install step is relevant only if you haveRapidMiner Radoopextension installed on any RapidMiner Studio instance. You can installRadoop Proxy一个long with RapidMiner Server, which is responsible for establishing tunnelled, secure connection to your Hadoop cluster. This is especially useful when you have a RapidMiner Server installed inside the same secure zone as your Hadoop cluster, letting the zone have less ports opened.
Starting the installation
Click![]() Installto begin the installation.
Installto begin the installation.
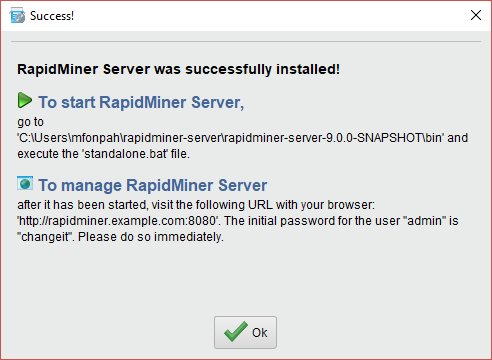
Note: If you do not have the correct administrative privileges, you receive a message telling you that theservicewas not registered to Windows services. If you receive the following message, however, the RapidMiner Server installation was successful:
Starting RapidMiner Server
After reading the information on theSuccessscreen, click![]() OKto complete the installation. Start RapidMiner Server in one of the following ways:
OKto complete the installation. Start RapidMiner Server in one of the following ways:
| Method | Description |
|---|---|
| Start the RapidMiner Server manually | In thebindirectory of your RapidMiner Server installation directory (for example,C:\RapidMinerServer\bin), find and execute thestandalone.sh(Unix) orstandalone.bat(Windows)文件。 |
| Start the RapidMiner Server service from the command line (Windows only) | Enter净启动< serviceid >一个t the command line to start the service. |
| Start the RapidMiner Server service through the Windows tool (Windows only) | Browse to theServicesdirectory on your machine (or searchServicesfrom theStartmenu) and locate the RapidMiner Server service. Right-click the service name and select to either start the service immediately or, through thePropertiesoption, to automatically start the service at system start-up. |
Read more:Run RapidMiner Server as a service(Windows或Linux)
When you start RapidMiner Server using the standalone script, the command window displays progress as the program populates the database with all its required tables. If this is the first start-up, the process may take several minutes.
Note:You can ignore the final message that the administration console service was not able to start.
When you start via the Windows service, you do not see the progress, just the finalStartedmessage in your Services window.
Once you have started the server, either via the services option or the standalone script, log in to the web interface. Open a web browser pointed at thehttp://
- User:一个dmin
- Password:changeit
Important:Please be certain tochange your password我mmediately.
Completing the installation
Once logged in, complete the final installation steps.
From theSQL Dialectpull-down, verify that the database type displayed is the one you used to create the RapidMiner Server database.
Verify the setting for the integrated Quartz scheduler, which is enabled by default.
Specify the path to the plugin directory. You can install additional RapidMiner extensions by placing them in, or saving them to, this directory. Note that all extensions bundled with RapidMiner Studio are also bundled with RapidMiner Server (no installation is necessary). These bundled extensions are stored in a separate directory that is independent of the path specified here. Be sure that you have write permission to the directory.
Specify the path to the uploads directory. This is the directory where RapidMiner Server stores temporary files needed for processes. The installation process creates a local uploads directory in the installation folder. However, if you install RapidMiner Server on a relatively small hard disk and, for example, use many file objects in processes or if you have large resulting files, consider creating a directory elsewhere in the cluster to store the temporary files. Be sure that you have write permission to the directory.
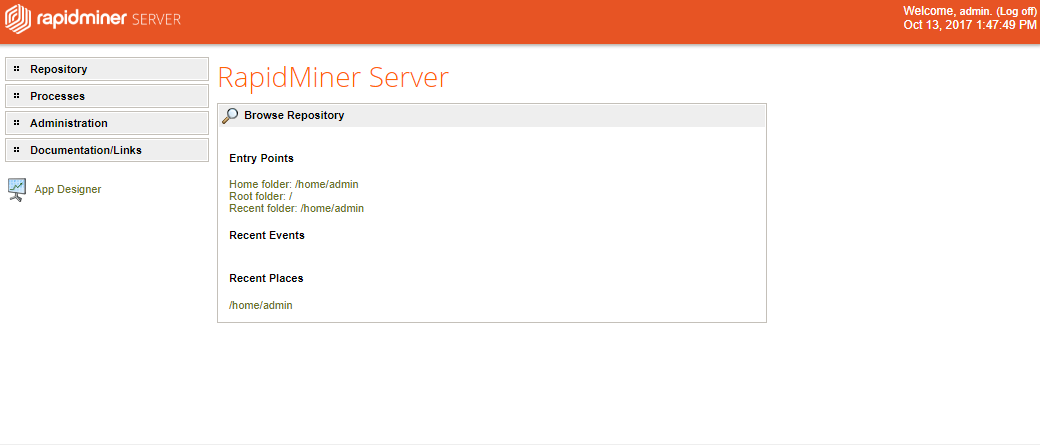
ClickStart installation now.When the installation completes, the RapidMiner Server Home page appears:

Changing the administrator password
Your first action, once installation is complete, is to change the administrator password. It is important to change the password at this point because connecting to RapidMiner Studio requires that you enter RapidMiner Server login credentials. Changing your credentials later means that you will have to correct this connection as well. To change the password:
Expand theAdministrationmenu on the left side of the window.
SelectPreferences.The Preferences settings for user一个dmindisplay.
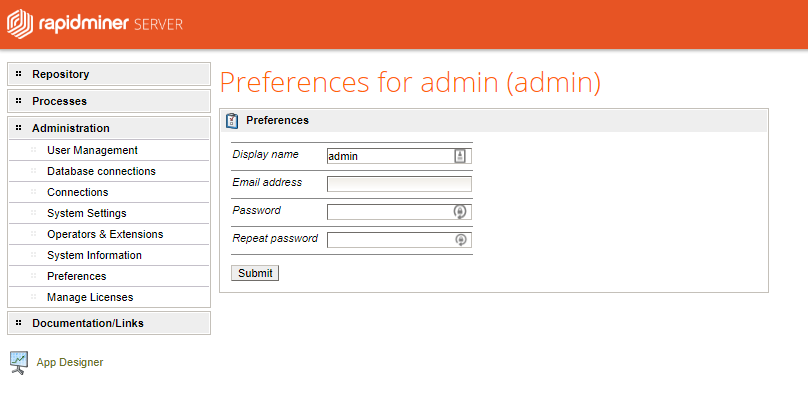
完整的字段如下:
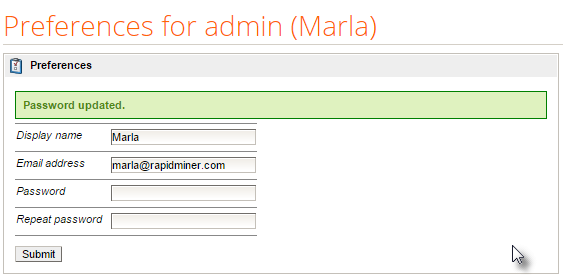
Field Description Display name On installation, the field defaults to一个dmin.Leave it, or change it to any name you want displayed for the administrator. The display name appears in parentheses in the window title. Email address Enter the email address associated with the admin account. Password Enter a new password for the administrator account. The password must be at least 8 alphanumeric characters. Repeat password Re-enter the new password to confirm. ClickSubmit.新迪splay name appears, as well as a confirmation of password change.


Congratulations, your RapidMiner Server installation is complete. Next up, connecting to RapidMiner Studio.
Connecting RapidMiner Server to RapidMiner Studio
Once you have finished installing RapidMiner Server, you associate it as a repository for RapidMiner Studio. In RapidMiner Studio you will design and test processes; in RapidMiner Server you can deploy the process on a larger scale.
To create the association, first open RapidMiner Studio:
In RapidMiner Studio, from theRepositoriestab, click the
 Create repositorymenu:
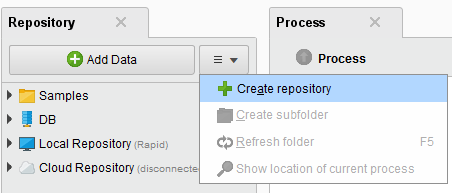
From theNew Repositorywindow, selectNew RapidMiner Server Repository.Click
 Next.
Next.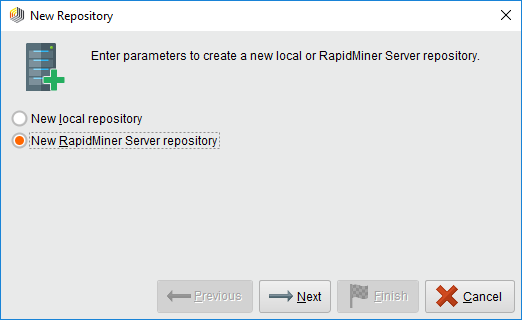
From the resulting window, specify the parameters for the repository connection.
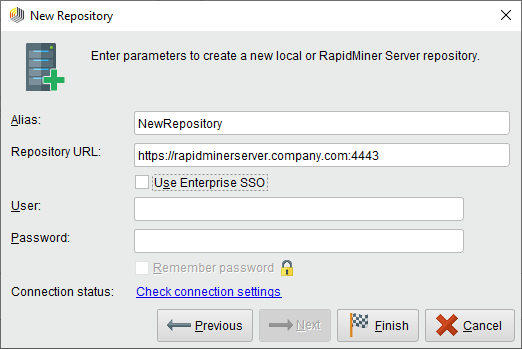
Complete the parameter fields:
Field Value Alias Enter the name to display in theRepositorylist in RapidMiner Studio. Repository URL Enter the RapidMiner Server URL (The one which you have already used in your browser to connect to the server). Use Enterprise SSO If the server being connected to isSAMLenabled, use that for User/Password. User Enter a valid username for a user with access to RapidMiner Server. On installation, user一个dmin我s accepted. Password Enter the password associated with the user. On installation, passwordchangeit我s accepted. Remember password Remember the username/password being entered for this repository Connection status Provides a link titled 'Check connection settings' that, when clicked, checks the server with the parameters specified. If the connection was successful value will change to 'Success' Click
 Check connection settingsto verify the credentials and test the connection to RapidMiner Server.
Click
 Finishto add RapidMiner Server as a repository.
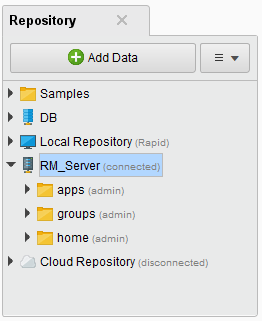


That's it! Get predictions at lightning speed, integrate your in-house data sources, and collaborate with coworkers and contributors throughout your organization and beyond. Welcome to RapidMiner Server. Have fun!